Working with Values
Contents
Overview
Value fields are a core component of Pivot and Chart views. Value fields are aggregations or calculations based on the underlying data that you want to display in your views.
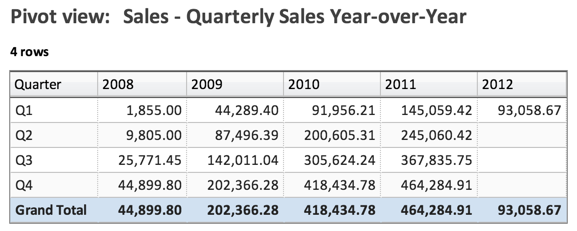
For example, the following pivot view shows sales per quarter (in the rows), comparing year over year (in the columns). In the pivot, the values are the numbers that are displayed in the pivot. In this case, the values are a sum, adding together all of the sales for the row and column:
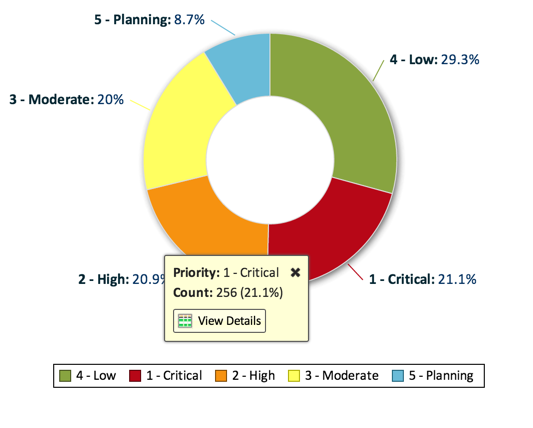
The following donut chart shows a count of incidents, grouped by priority. In the chart, the slices of the donut are proportional to the value (count of incidents):
Selecting a Value Field
The process for selecting values is similar for both Pivot and Chart views.
To select values, navigate to the view, and click the Select Fields button to reveal the field selection pane.
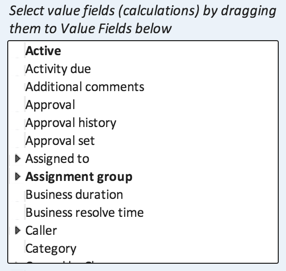
In the selection pane, there is a field that displays all the fields available on the view's table, labelled with an instruction:
Any reference fields will be marked with a right-facing arrow. Click on them to select fields from related tables:
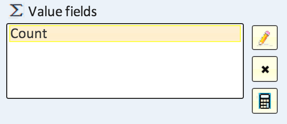
To add the value to the chart, simply drag the desired field onto the Value fields field.
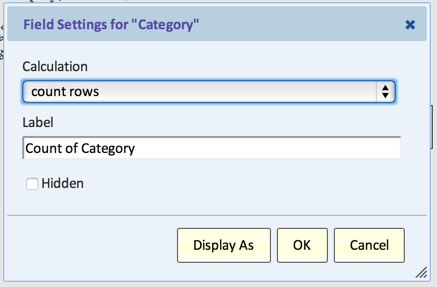
When the fields is dropped onto the Value fields field, a Field Settings dialog will appear to give further options on how to display and calculate the values.
Alternately, you can generate values using Calculated Values, which are created by formulas based on other values.
Defining Field Settings
Field Settings define how the values are calculated or aggregated for the view.
The value is defined by the following options:
- Calculation - Defines how the values are calculated. Choices are:
- sum - Available for numeric and duration fields -- Adds all of the data within the category.
- count rows - Counts how many rows of data within the category.
- count distinct values - Counts how many unique values of the selected field exist within the category.
- count non-empty values - Counts rows of data for which the selected field is not null within the category.
- average - Available for numeric and duration fields - Averages all of the data within the category.
- min - Available for numeric and duration fields - Returns the lowest value within the category.
- max - Available for numeric and duration fields - Returns the highest value within the category.
- median - Available for numeric and duration fields - Returns the median of the data within the category. This calculation is currently only available in a composite view.
- percentile - Available for numeric and duration fields - Returns the specified percentile of the data within the category. This calculation is currently only available in a composite view.
- average age - Available for date-time fields - Converts the date-time to an age (duration since the date-time), and averages all of the ages within the category.
- min age - Available for date-time fields - Converts the date-time to an age (duration since the date-time), and returns the lowest age within the category.
- max age - Available for date-time fields - Converts the date-time to an age (duration since the date-time), and returns the highest age within the category.
- sum of age - Available for date-time fields - Converts the date-time to an age (duration since the date-time), and adds all of the ages within the category.
- Label - Defines the name of the value as it is displayed in the view. Should be unique from other Value fields.
- Hidden - If checked, the value will not be rendered as part of the view. Hidden values are typically used as inputs for Calculated Values.
Display As
Clicking the Display As button provides additional options for displaying the value. Display As options do not change the value, but instead provide different ways of presenting the same data.
The additional options available are:
- difference from - Shows the difference from the value of the Base Item in the Base Field.
- % difference from - Shows the percentage difference from the value of the Base Item in the Base Field
- % of - Shows values as a percentage of the value of the Base Item in the Base Field
- running total in column - Shows the values in each column as a running total
- running total in row - Shows the values in each row as a running total
- running total in - Shows successive items in the Base Field as a running total. For example, if the Base Field is "Month", then "running total in month" will run a total of January, February, and so on. It creates a running total for every combination of other row/column fields except "Month". For example, for every product and every year there's a running total in Month.
- running total by - Show items for the each item in the Base Field as a running total. For example to have a running total showing the balance of an account use "running total by account".
- % of row - Shows the values in each row as a percentage of the total for the row
- % of column - Shows the values in each column as a percentage of the total for the column
- % of total - Shows the value in each cell as a percentage of the total for all cells
- % of total by - Shows the value in each cell as a percentage of the total by Base Field
- % running total in column - Calculates running total in column, then display it as % of column
- % running total in row - Calculates running total in row, then display it as % of row
- % running total in - Calculates running total in Base Field, then display it as % of the total in Base Field
- % running total by - Calculates running total by Base Field, then display it as % of total by Base Field
Reference Line
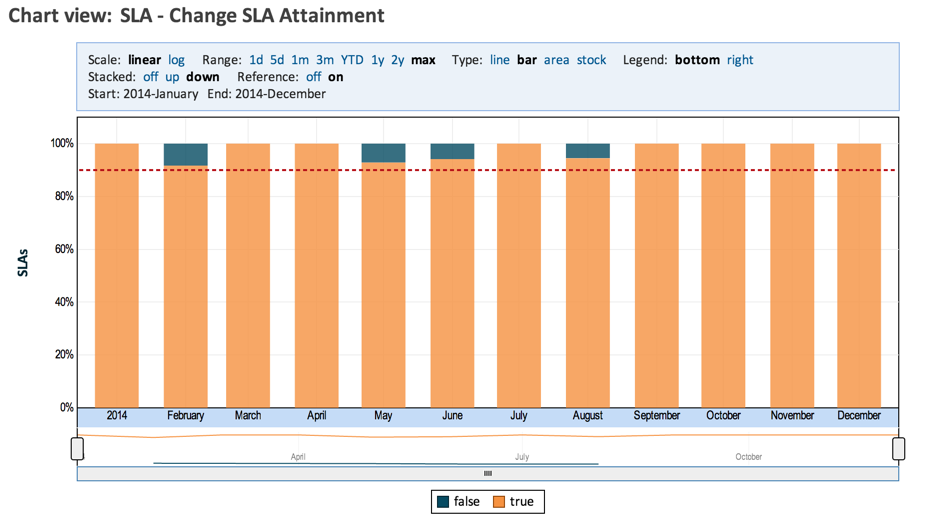
A Reference Line is an annotation over the chart, available for Timeline views. Each Value in a timeline chart can have a reference line, shown as a dashed red line across the chart.
For example, this timeline chart is showing a reference line at a constant 90% across the chart:
To add a reference line:
- Select the value to which you'd like to add a reference line.
- Click the Edit icon to open the Field Settings dialog.
- Click the Reference Line button, which will add the additional options. Populate the following options:
- Reference Line - select the type of reference line (currently Constant or None).
- Reference Line Threshhold - The value along the Y-Axis for this value where the reference line will be drawn.
