Configuring a ServiceNow Data Source
Contents
Overview
Explore Analytics is tightly integrated with ServiceNow to deliver superb data analysis, visualization, and reporting.
- Application-Level Data Access - Explore Analytics connects to your ServiceNow instance using a Web Service (aka SOAP). Connecting through the application ensures that you see the familiar data that you know in ServiceNow and subject to the security access control rules that are defined in the application.
- High Performance - Whenever you access data, Explore Analytics pushes 100% of the data filtering, grouping, and aggregation to the ServiceNow application. By performing these operations at the application, Explore Analytics eliminate the need to pull large numbers of records from your ServiceNow instance.
- Friendly Table and Field Names - Explore Analytics shows the friendly labels that are assigned in ServiceNow so that you see names such as "Shopping Cart" and "Catalog Item" rather than "sc_cart" and "sc_cat_item" respectively.
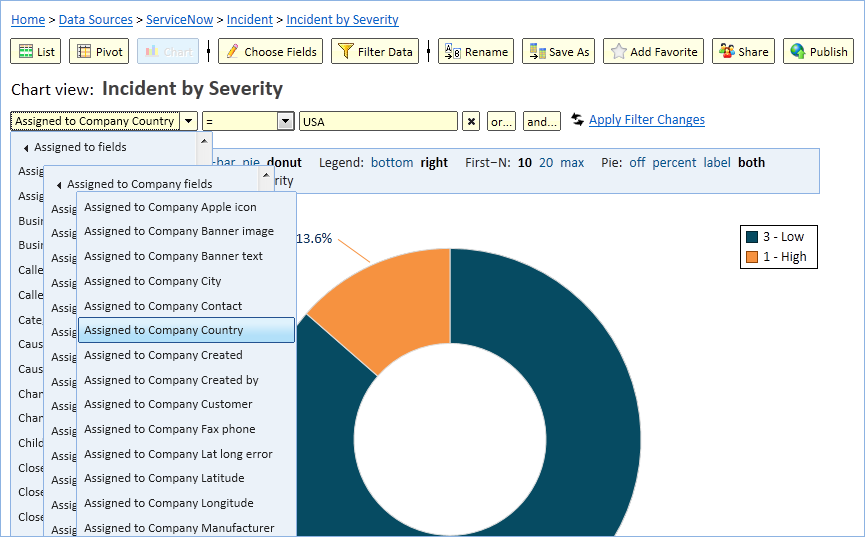
- Friendly Filter Choices - ServiceNow makes extensive use of choice lists and Explore Analytics fully supports them so that you can construct a filter that looks like "Incident State = Resolved" rather than "state = 6".
- Reference Fields - Explore Analytics understands reference fields and uses them to relate tables and combine multiple tables in a view.
- Duration - Explore Analytics fully supports duration fields (glide_duration). It can perform calculations on time duration such as average elapsed time and use it as a numeric scale in a chart.
- Display Field - Explore Analytics understands the ServiceNow concept of display field and uses it in filters to allow you to naturally construct a filter such as "Caller = Beth Anglin" rather than "caller_id = 46d44a23a9fe19810012d100cca80666".
- Default View - ServiceNow defines a default view for each table. This view organizes fields in a tabular list. When you create a new view in Explore Analytics, it creates a list view that reflects the fields selected in the ServiceNow default view.
- Governance - Explore Analytics limits its load impact to your ServiceNow instance in two ways. Every data access request that it sends to ServiceNow includes a row limit such that it never requests more than a few thousand rows, no matter the size of your ServiceNow tables. Additionally, the number of concurrent requests is limited to a configurable number.
- Security - Explore Analytics connects to your ServiceNow instance using a ServiceNow user that you configure with (only) the necessary roles for data access. Explore Analytics respects access control to tables, fields, and records. Explore Analytics utilizes strictly read-only access and does not allow users to modify data. The data flows to the user's browser without being stored on the Explore Analytics server.
Configuring the Data Source
Before configuring the data source in Explore Analytics, you'll need to setup Explore Analytics on your instance.
Setting Up Your Instance
You'll need to perform the following steps:
- Install the Update Set
- Define a user
Install the Update Set
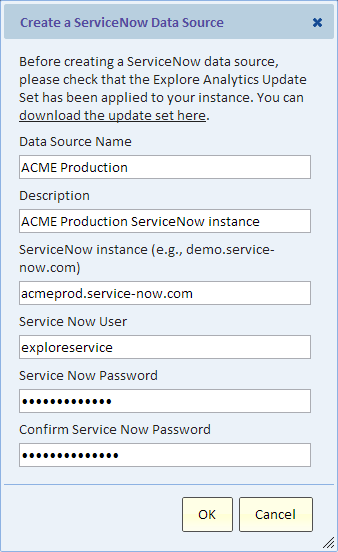
The Explore Analytics app is delivered as an update set that you can import and commit. The update set contains the Explore Web Service. This web service performs data access requests. You can download the update set XML file from the "Create a ServiceNow Data Source" dialog (see image below). You can then import it to your "Retrieved Update Sets" in ServiceNow, preview and then commit it.
Define a User
Explore Analytics connects to ServiceNow using a specified user. You can setup a user account for Explore Analytics and control data access using roles. You can think if this account as a service account that's only used by Explore Analytics. You can give this account any name and password.
Define this user account and grant it the "soap_script" role to allow access to the Explore Web Service using this account.
Setting up the Data Source
In Explore Analytics, select "Add a ServiceNow Data Source" from the Data menu. In the dialog that appears, add a name and description for this data source. Specify the instance domain name, e.g., acme.service-now.com, and the user and password that you defined in the previous step. Click OK and the following things would happen:
- Explore Analytics will configure the data source with all the ServiceNow tables that are accessible to the specified user.
- Explore Analytics will configure the tables with all the fields that are accessible to this user. For each field it will configure its label, type, choice list, display field, and reference table if applicable.
- Explore Analytics will use the information about ServiceNow reference fields to define Explore Analytics reference fields.
- Explore Analytics will define default views for each table based on its default view in ServiceNow.
This can take a few moments to complete. Once it's done you're ready to start exploring your data and building views of the data including lists, pivots, and charts (visualizations).

